Good morning!
I've been wanting to improve my decorating skills for a while now, and I thought it'd be a fun idea to experiment using royal icing. Tomorrow, for those who don't know, (but you really should unless you're living under a rock) is Easter. Growing up in a Christian home, we always celebrated Easter as the resurrection of Jesus Christ. Be that as it may, my parents still exposed me to society's view of Easter when I was younger. My parents would fill an Easter basket for me, go and get my picture taken with the Easter Bunny at a local store, but were always clear on what the real meaning of it was.
After my family and I go to church on Easter morning, we come home and have a big lunch. This year for dessert my mom and I are going to be making Carrot Cake with Cream Cheese Frosting, and I thought I'd use my inspiration from Sweet Sugar Belle make these cute royal icing carrots to decorate it with.
I didn't want to make a regular size batch of Royal Icing to make these, because I really didn't want to make 100 carrots out of royal icing (give or take) . I did some searching on the internet and came across this recipe for a small batch of royal icing from Katrina's Kitchen.
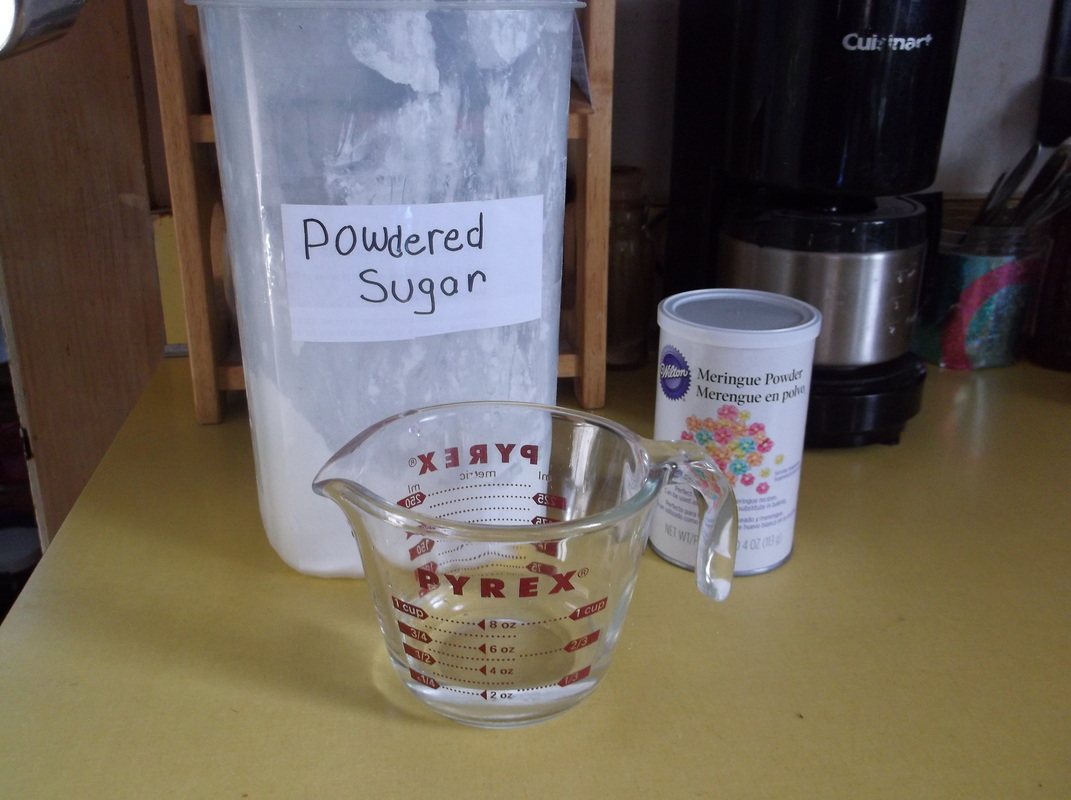
Small Batch Royal Icing
You'll need:
2 cups powdered sugar
2 tbsp. meringue powder
1/4 cup warm water
1/2 tsp. vanilla or almond extract (clear is ideal, but I used the regular color and had no problem)
1) Begin by mixing the powdered sugar and the meringue powder together in a bowl using an electric mixer.
2) Add the water and extract slowly. Beat at medium-high speed until stiff peaks begin to form. (This usually takes about 5-7 minutes)
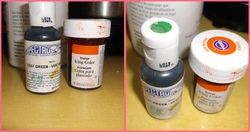
In order to achieve the orange carrot and green stems I used food coloring. My favorite types of food coloring are the gel pastes, they give whatever you're making a vibrant color! In this case I used Wilton's gel formula icing color in orange, and Spectrum's gel paste in 'Leaf Green'.
Simply add in the desired amount and mix it into your icing. (The amount depends on how bright and vibrant you want your icing color to be.)
Simply add in the desired amount and mix it into your icing. (The amount depends on how bright and vibrant you want your icing color to be.)
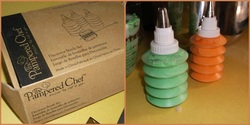
To pipe the carrots I used Pampered Chef's Decorator Bottle Set . I used a knife to scoop in the icing into the bottles. A little time consuming, but it was easiest for me.
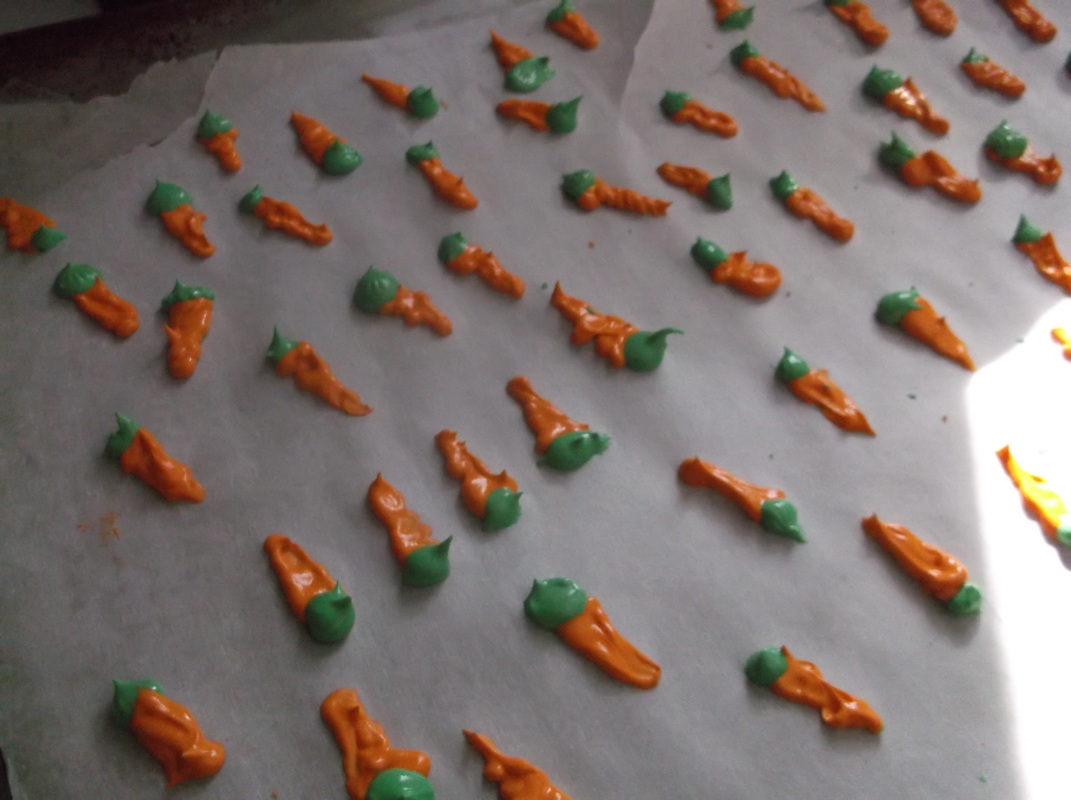
Lay out a sheet of wax or parchment paper onto a cookie sheet in preparation to pipe. I had to tape down the edges of the paper, because they kept popping up. I used the leaf and star tip for the green icing (stems) and the writing tip for the orange icing (carrots). Assuming everyone know what a carrot looks like, there is really not much else to it. I found it easier to pipe the base of the carrots first and then the stem, but either way works. I also found it easier to work upside-down, that is, piping the wider end of the carrot first and then working my way up to the narrow end.
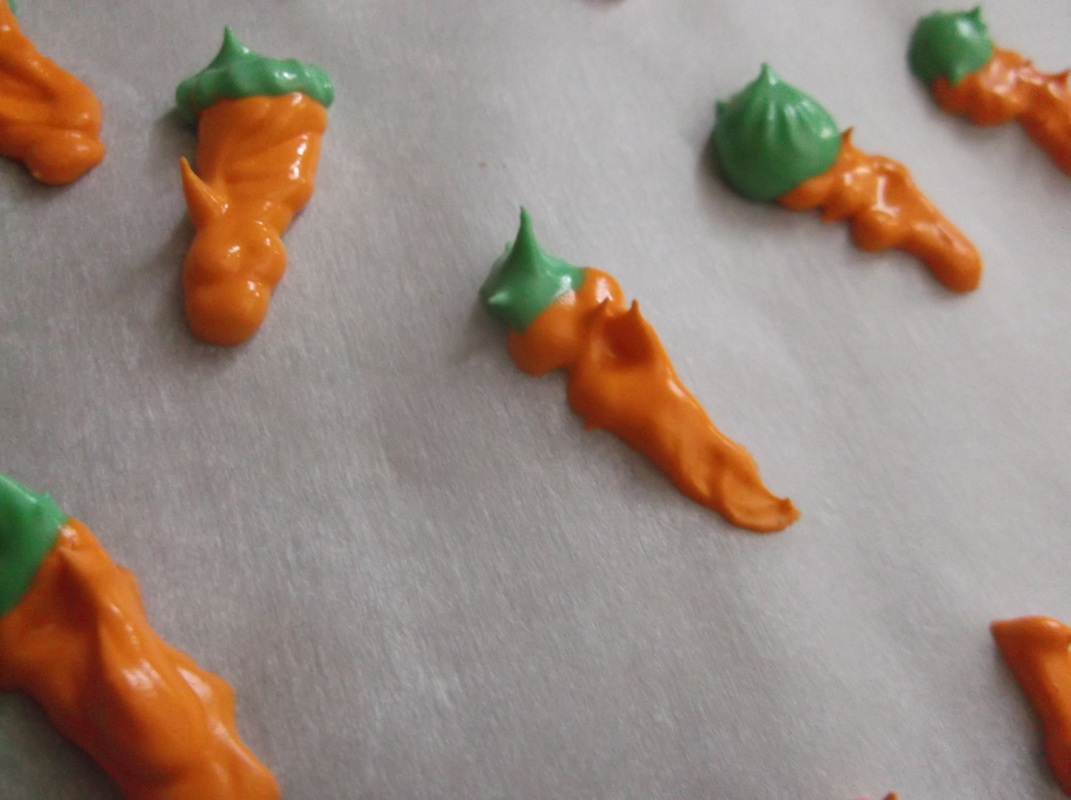

These need to be left sitting out to dry for 24-48 hours.
Mine are still drying in the pictures above, so tomorrow I will show you how they turned out!
Have a nice day everyone :)
Mine are still drying in the pictures above, so tomorrow I will show you how they turned out!
Have a nice day everyone :)

 RSS Feed